
When one day you notice some damage to the foundation, you urgently need to begin work to repair and strengthen it.
To do this, you need to determine necessary materials, sequence of work and its volume.
For the owner of a brick house, repairing the basement poses the following tasks:
- how to make the bearing capacity of the foundation stronger;
- how to prevent later various deformations of the soil next to it.
Why does the base collapse?
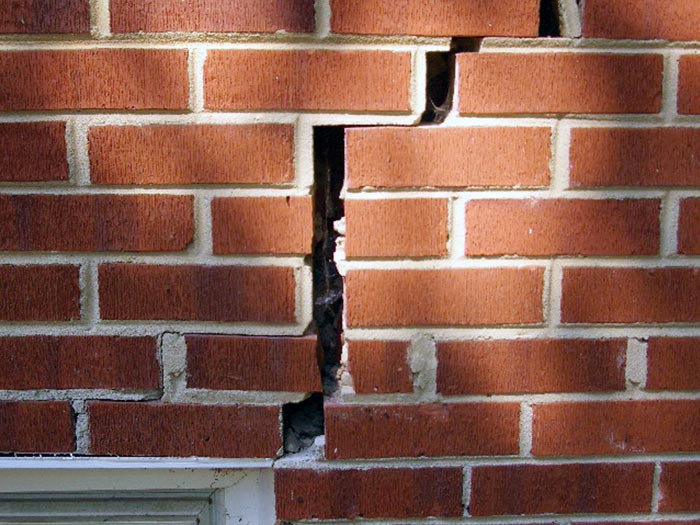
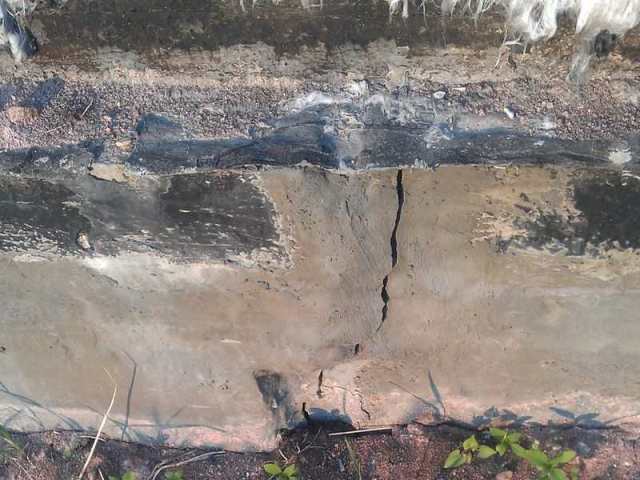
First of all, take control of the cracks that have appeared not only in the base, but also in the foundation of the building. Place several markers across them, for example, with inside the bases are beacons made of alabaster or gypsum, the outer ones are made of CPS (cement-sand mixture).
Observe them for about 20 days. If the markers are intact, simply seal the cracks. In the same case when they collapsed, it is necessary to understand the reasons for their appearance.
Only then can measures be taken that relate to repair work to stop future destruction. You can do the work yourself or invite builders with the necessary equipment.
If you notice that the house has distortions in door and window openings or that soil deformation has appeared around the perimeter, you need to pay attention to this, since these processes indicate a dangerous condition of the foundation.
When the foundation is hidden from visual inspection, and it is difficult to determine the reasons for the increase in cracks, it is necessary to drill control holes. They will help you understand the condition of the base of a brick house and find out the reasons for the deformation.
They can be divided into “man-made”, which appeared due to human actions, or natural.
Also, deformations and cracks may occur due to:
- incorrect choice of location for construction, for example, groundwater levels were not taken into account;
- poor design - they forgot about drainage, did not install blind areas, did not protect the base from moisture;
- problems that arose during laying, for example, those associated with low-quality building materials;
- trees planted close to the house with a powerful root system;
- unaccounted vibration power internal and external influences during the operation of the house;
- artificial waterlogging of the soil around the perimeter of the building.
Advice: use only building bricks to build a house, never use hollow bricks or silicate bricks for the foundation.
It is recommended to use solid ceramic for this purpose.
Materials
The purpose of repairing the basement is to install a fence outside the underground space. It must be strong and stable enough to withstand groundwater and precipitation. Therefore, it is so necessary to choose the right building materials.
Natural:
- sandstone;
- shell rock;
- limestone;
- basalt;
- granite;
- silicate or red brick.
You can also use precast or monolithic concrete, as well as cement-based mortars with:
- sand;
- sand and lime;
- sand and clay.
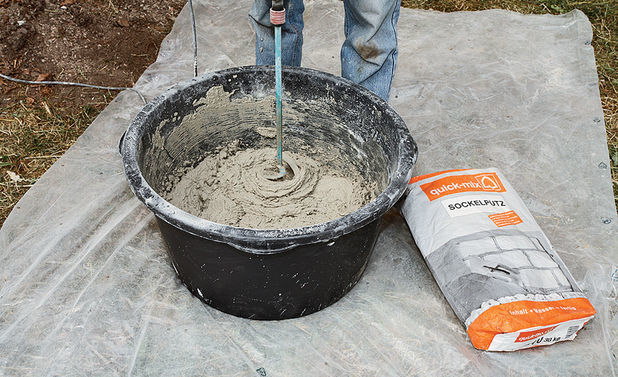
To make concrete mortar, prepare cement, gravel or crushed stone, sand and water (1: 3: 5: 1). Their number depends on the volume of work.
There is also a direct dependence of the thickness of the base on the material:
- brick – 120 mm;
- rubble stone – 200 mm;
- reinforced concrete – 100-120 mm.
Strengthening the foundation
The instructions for repairing the base resemble the creation of an external reinforcing foundation.
- Start work with a control pit, when it is necessary to dig a trench along the perimeter of the old foundation to its base.
Advice: to improve the quality and safety of the process, open the old base and lay the new one in small sections, approximately 1.5 m in increments of up to 4 m, while insuring the walls with wooden struts.
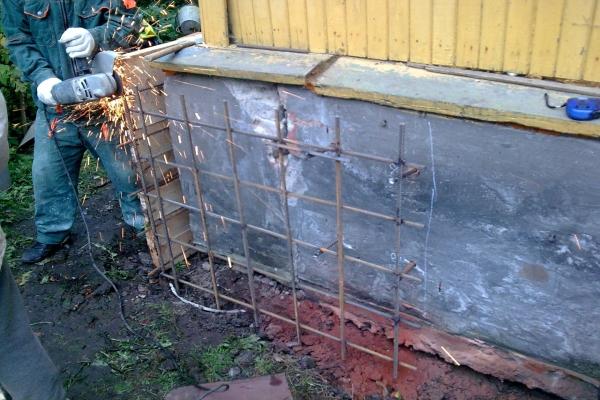
- Connect it to the reinforcement from the base by welding or tying wire. Frame cell – 200x200x200 mm.
- Install formwork, such as laminated plywood, in the trench.
- Fill the frame with concrete.
Advice: if you don’t have time to do the work simultaneously along the entire perimeter of the foundation, do it in parts, i.e. While the concrete hardens in one area, assemble the reinforcement cage in another.

Screw piles for repair
The cost of such work will be significant, so they are very rarely used for old foundations.
If there are sufficient material resources, then screw piles can be safely used instead of pneumatic equipment, since this will compact the soil rather than loosen it.
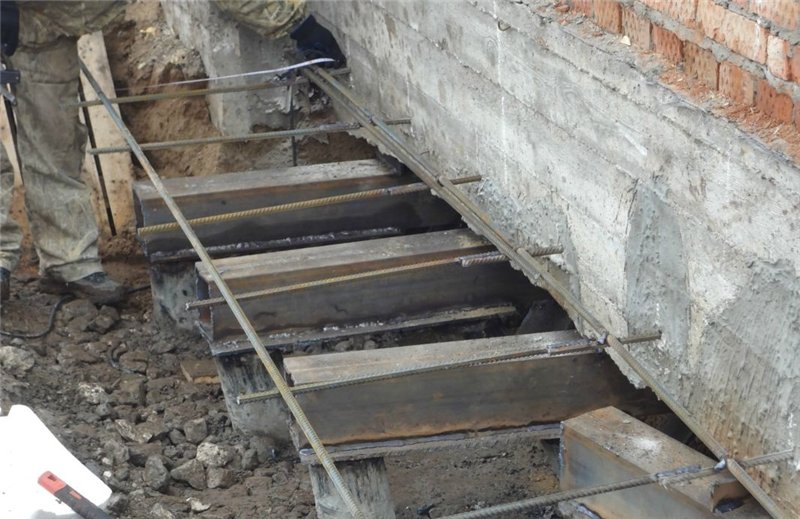
- Dig a trench around the perimeter of the old base and install piles in its bottom to the required depth.
- Fill them with concrete and tie them together with an I-beam.
- Fasten the structure to the old base with metal anchors and fill it with concrete.
- Protect the reinforcing foundation with waterproofing.
Advice: make drainage if there is a threat of seasonal flooding of the base.
When the soil is waterlogged.
Typically from the inside of the basement, widen the basement vents.
Conclusion
Repairing the basement of an apartment building or a private one is necessary for many reasons, the main one of which is to protect the building from complete destruction. Used for this various ways and materials. In the video presented in this article you will find additional information on this topic.
Caring for foundations consists of monitoring their condition, preventing and timely eliminating the causes of their destruction. Such reasons include poor-quality foundation masonry during construction, unrepaired areas of the foundation with weak soil, lack of underground ventilation, lack of proper drainage of water from the walls of the building and the presence of faulty water supply and sewer networks.
Current repairs include replacing fallen stones, sealing cracks,
restoration of damaged plaster, repair of slopes, repair and restoration of drainpipes.
After thorough cleaning of the sealing area, the fallen stones are replaced, cracks and seams are sealed with a cement mortar of composition 1: 3 or 1: 5.
The blind area is restored and repaired by dismantling the damaged area with a grab neighboring plot by 10-15 cm. The cover of the blind area is made with the proper slope from the wall.
The plaster is repaired by knocking off the loose part of it, cleaning and washing the area, onto which new plaster is then applied.
Overhaul of the foundation consists of replacing the old one, widening the base, and filling cracks with cement mortar.
To replace the pillars, the building is suspended by lifting it with jacks. If the building is wooden, then immediately hang up the entire wall and install supports. After hanging the building, the plinth and the fence between the pillars or chairs are dismantled and then the well is torn out to lay a new pillar.
The depth of its placement depends on the properties of the soil. For heaving soils, the base is laid below the freezing level of the soil. In cases where the well is backfilled with sand (sand does not change volume when frozen), the laying depth is 1 m. In non-heaving soils, the foundation is laid to a depth of 0.7 m. In addition to rubble stone, well-burnt brick can be used. When laying pillars, the foundation edge is not brought to the bottom crown by 5-6 cm. A cement mortar screed is laid along the edge. A layer of roofing felt waterproofing is laid over the screed. The lower crown is antiseptic. A board wrapped with roofing felt is tightly placed in the gap between the masonry and the crown. After this, pick-ups are carried out in the order described above, and the base is restored. Strip foundations they are rebuilt in sections 1-2 m long. The building is laid down (the jacks are removed) when the new masonry is sufficiently strong.
Work on changing foundations begins with the installation of fastenings - supports. After this, individual sections of the foundation are torn off and a horizontal groove is punched to lay the unloading steel beam. In the upper part of the walls, where the supports are installed, through holes are punched for inserting steel beams. One end of the beam rests on a support, and the other on racks installed inside the building; thus, the wall is, as it were, suspended on these beams.
The damaged foundation is dismantled in separate sections 1.5-2 m long, leaving fines in the old foundation. After dismantling and clearing the area, new masonry is carried out using cement mortar, with a dense liner of stones in rows under old masonry and wedge the stones of the top row under the laid unloading beams, observing the bandaging of the seams.
When overhauling foundations, special attention should be paid to the condition of the waterproofing. Its restoration is the most responsible and difficult work. Foundations are usually replaced from layers located below the waterproofing in order to preserve it.
Particularly important work when installing waterproofing of basement walls. In these cases, the wall surface is cleaned of dirt and old mortar and plastered with cement mortar.
For better insulation of basement walls from groundwater On the outside of the building, a trench 25 cm wide is dug, which is filled with crumpled clay.
Alexey Shamborsky, 08/10/2015
The basement of the building is exposed to aggressive influence of many factors. It needs repair more often than other areas. You can’t delay with her. After all, the destruction of the base reduces the durability of the entire structure.
To prevent damage to the plaster from leading to the growth of mold and preventing moisture from destroying the wall, you need to correct the situation and promptly repair the basement of the building. As a rule, it consists of restoration of seams and new plastering of certain areas. Sometimes when repairing the basement of a brick house you have to replace individual bricks.
Step by step instructions
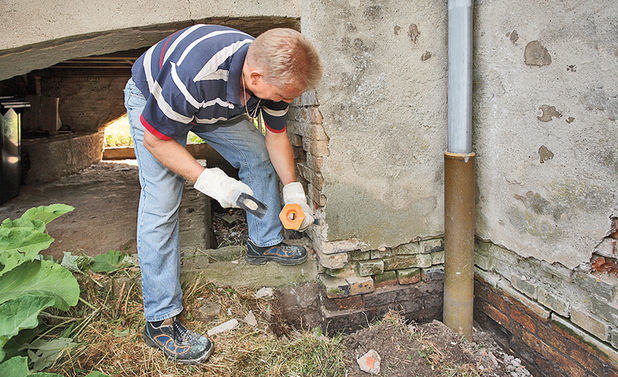
First, free the lower part of the wall from contact with the ground. A shovel is used for this.

Then remove all fragments of plaster that do not adhere well; you must try not to miss any voids; they can be identified by tapping. All loose plaster is beaten off with a hammer or chisel.

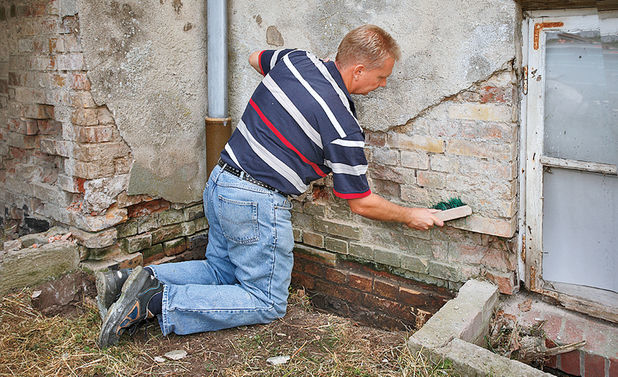
Then the surface is cleaned of dirt and dust. Use a wire brush to thoroughly remove all remaining plaster. You can see how to do this work in the photo or video.
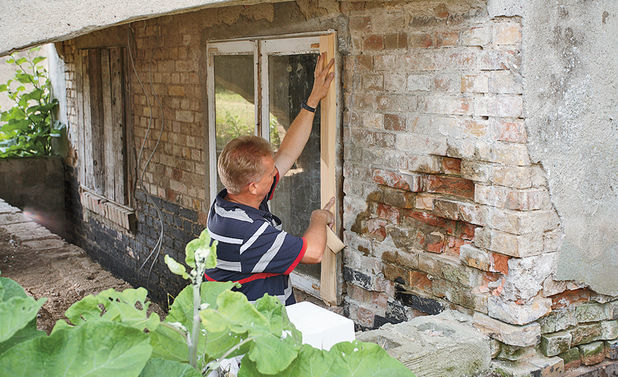
All surfaces that need to be protected from plaster, such as window frames, must be covered with masking tape. It will protect important areas from contamination.
Detected defects in the masonry are moistened before repairing the brick plinth lining. This is necessary to ensure better contact of the plaster mixture with the surface.
To fill the existing voids, you should select bricks of the appropriate size. You can cut fragments of the desired size from aerated concrete blocks.
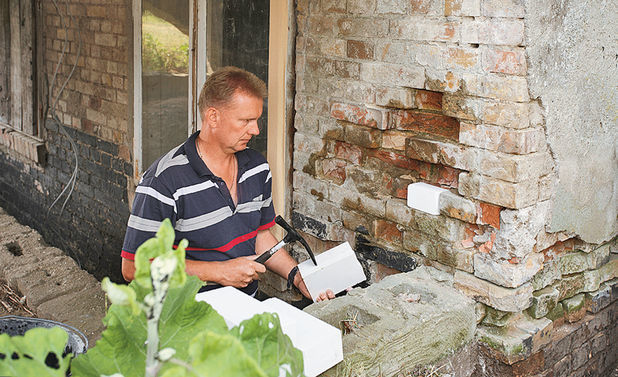
The next stage of repairing the basement with your own hands is to fill the voids with prepared bricks and secure them with masonry mortar.
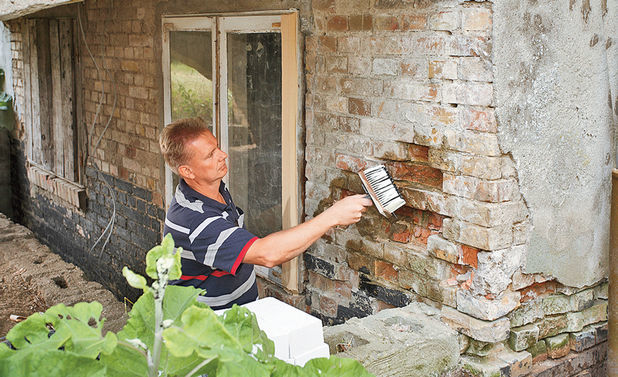
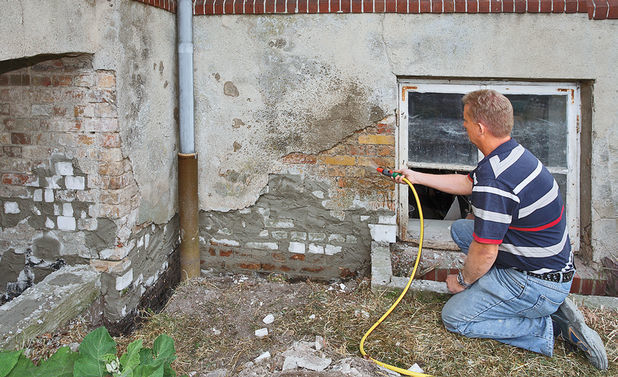
Before plastering the surface, it must be thoroughly moistened. To do this, you can take a bucket and a brush, but it’s easier and faster to wet the wall with water from a hose.
Then a solution (waterproofing slurry) is prepared for waterproofing. The mixture is diluted with clean water.
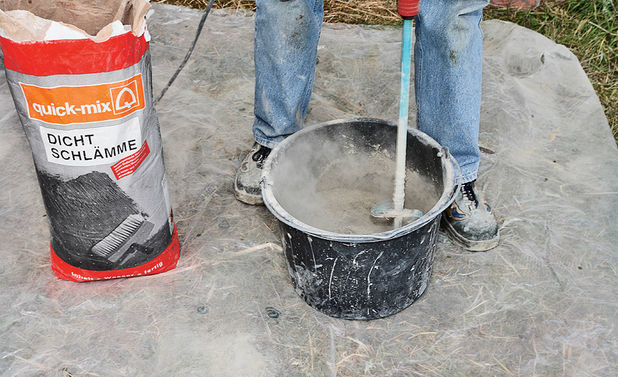
The solution is applied to the restored areas in 2 passes. First, a thin layer of 1 - 2 mm, when the first layer begins to set, apply a second layer of 3 mm. In this case, you can use a brush or a wide spatula.


The applied layers must stand for 24 hours. You can continue working the next day.
Then a solution for plaster is prepared.
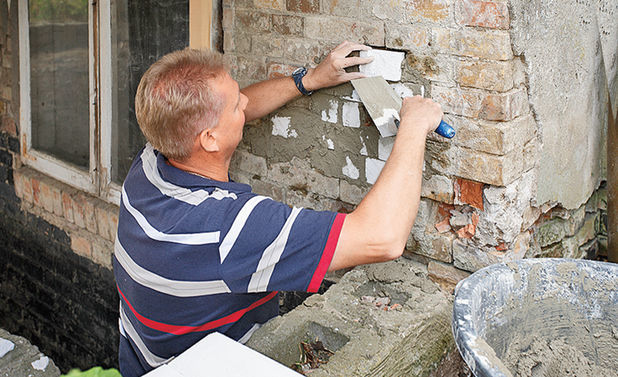
Perform a 2-layer application again. First, apply a layer of 10 mm. The plaster is rubbed forcefully over the surface, moving the spatula in a semicircle.

To ensure that the walls are ultimately smooth, it is advisable to use plaster strips, when installing which you should use a level. These planks come in several varieties. In this case they are made of wood.
![]()
The next layer of plaster is applied with a thickness of 15 - 20 mm.

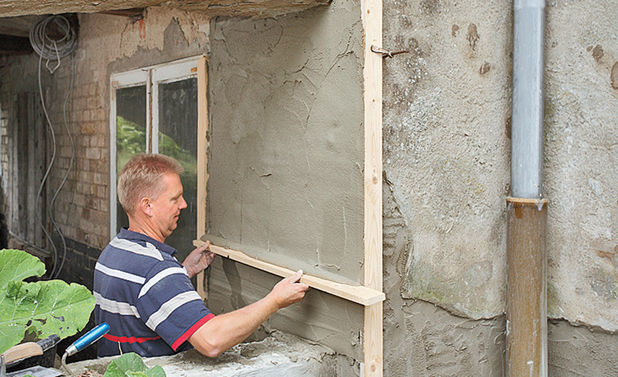
The plaster is carefully applied over the entire surface; it is advisable to fill the entire surface with it down to the foundation. Then it will be possible to talk about a complete and high-quality repair of the plinth plaster.


The base point for removing excess mortar will be not only the plaster strips, but also the intact layer of cladding, as in the photo.
When the surface dries, it is leveled using a plaster float.